Upscayl Turns Blurry Photos Sharp Using Free AI Models
Got old photos that look fuzzy on modern screens? Upscayl might save them.
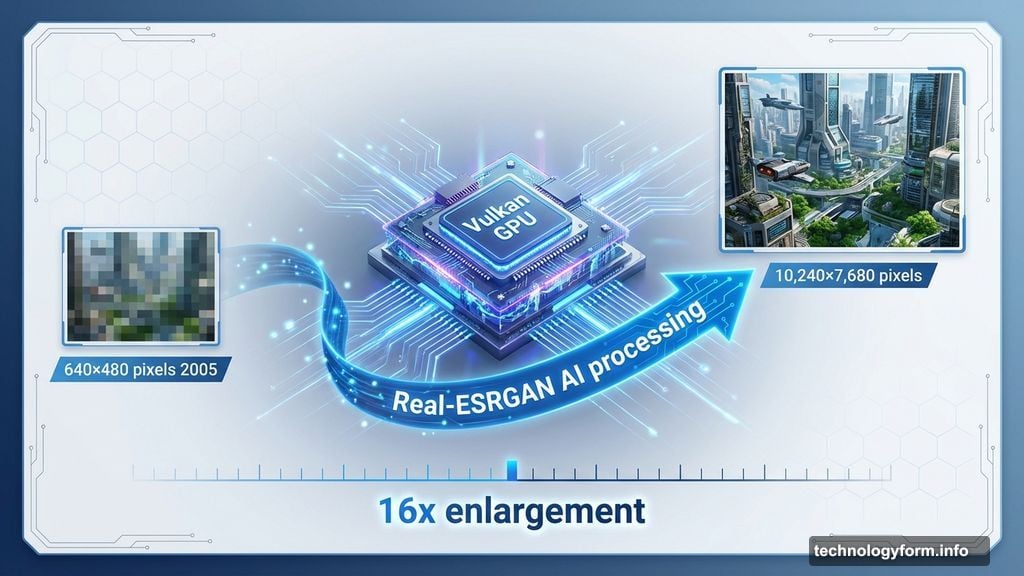
This free AI tool enlarges small images up to 16 times their original size. But it does more than simple scaling. Instead, it uses machine learning to guess missing details and sharpen edges. That 640×480 pixel photo from 2005? Upscayl can transform it into a crisp 10,240×7,680 image.
The catch? You need a decent graphics card. Upscayl requires Vulkan-compatible GPU hardware, which rules out most integrated graphics. But if you have a dedicated graphics card from the last few years, you’re probably good to go.
Check Your Graphics Card First
Before downloading anything, verify your GPU supports Vulkan. Two quick ways to check:
Visit vulkan.gpuinfo.org and search for your graphics card model. Or download the free GPU-Z utility and look for Vulkan support in the specs.
Most dedicated graphics cards from 2016 onward meet the requirements. Integrated Intel and AMD graphics often don’t. So laptop users might be out of luck unless they have discrete graphics.
Why the GPU requirement? Upscayl uses Real-ESRGAN and Vulkan architecture for AI processing. These technologies demand serious graphics horsepower. Your CPU alone won’t cut it.
Installing Takes Minutes
Head to the Upscayl website and grab the installer for your operating system. Windows users get a standard setup file. Mac users get a DMG. Linux users can choose from multiple formats: DEB, RPM, AppImage, Flatpak, or Snap packages.
Launch the program after installation. The first-run setup asks you to pick a language and decide whether automatic updates should run. You can also choose between light and dark themes. But all these settings can be changed later.
A brief tutorial video plays next. Skip it if you want—the interface is pretty straightforward. Everything centers around loading images, picking an AI model, and hitting the upscale button.
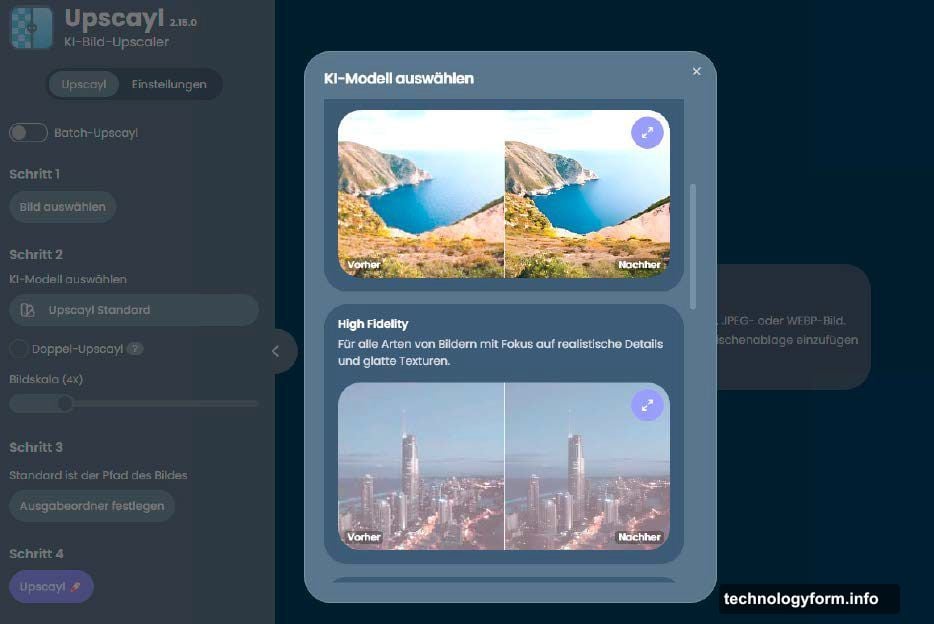
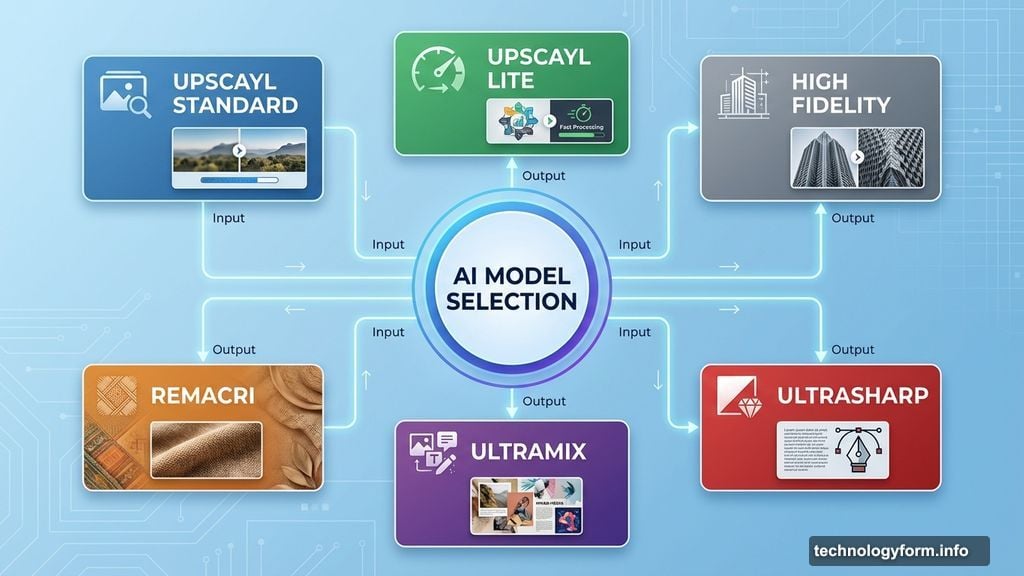
Understanding the Six AI Models
This is where Upscayl gets interesting. The tool includes six different AI models, each trained for specific image types.
Upscayl Standard handles most photos well. Built on Real-ESRGAN, it aims for balanced results across different image styles. Start here unless you know you need something specialized.
Upscayl Lite trades some quality for speed. The quality loss is minor, but processing happens faster. Great when you’re scaling dozens or hundreds of images.
High Fidelity excels at architectural shots and urban photography. It maintains realistic details and smooth textures in buildings and cityscapes.
Remacri enhances fine details and color accuracy. Photos with complex textures—think fabric, foliage, or intricate patterns—benefit most from this model.
Ultramix splits the difference between speed and quality. It’s sharper than Standard but processes faster than High Fidelity. Ultrasharp pushes sharpness even further, though sometimes at the cost of natural appearance.
Digital Art targets illustrations and pixel graphics. It preserves artistic styles better than photo-focused models. Plus, it can upscale retro pixel art without blurring the characteristic blocky aesthetic.
You can even add custom models in NCNN format if these six don’t meet your needs.
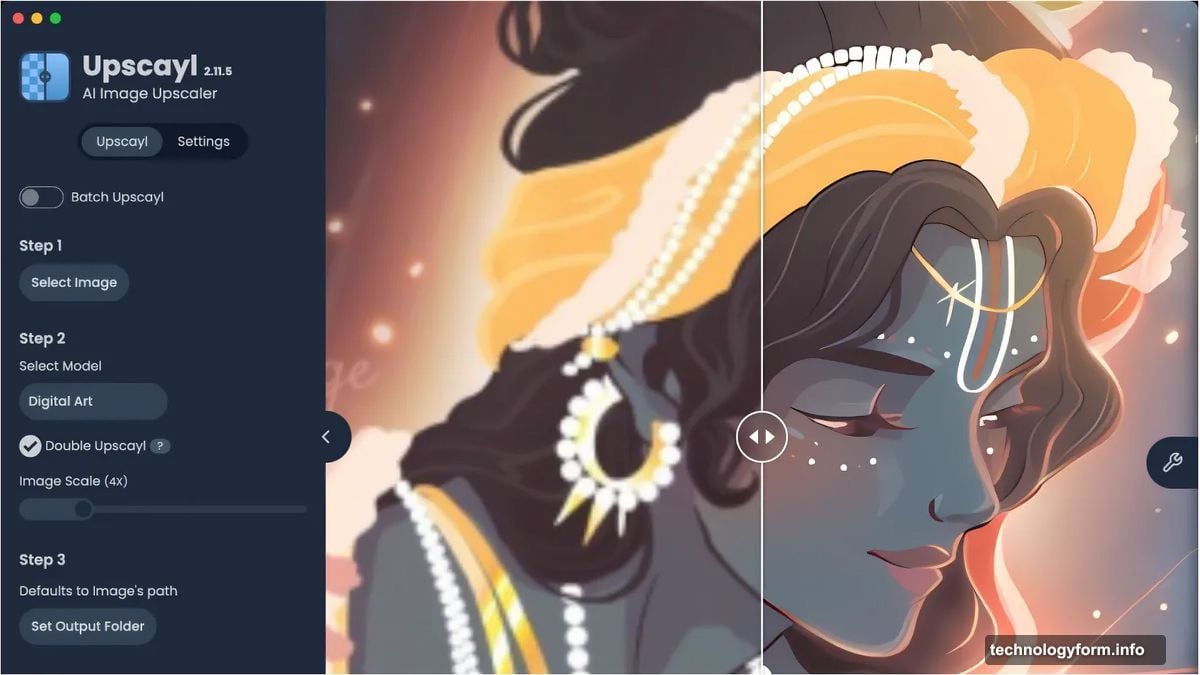
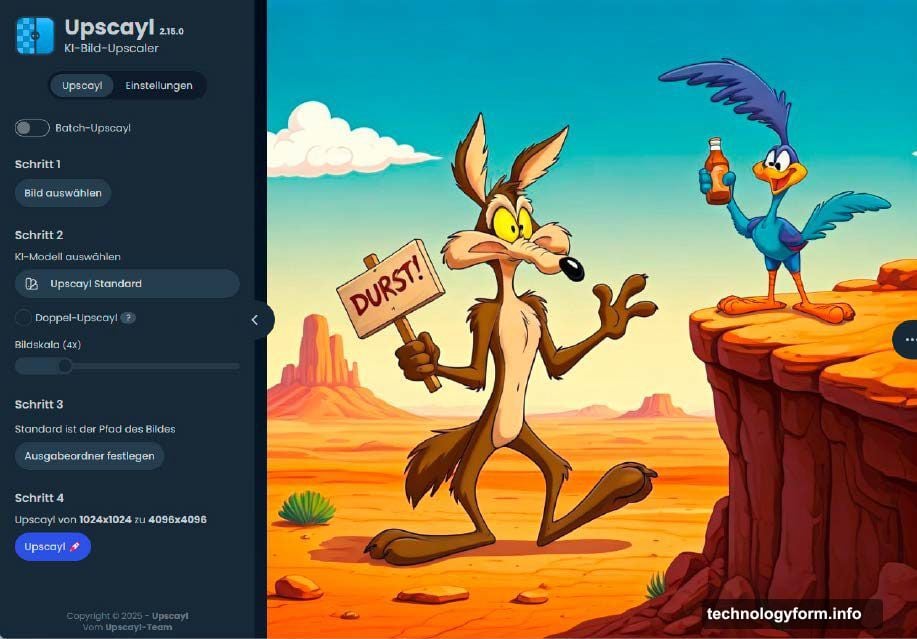
Setting Up Your First Upscale
Click “Select Image” or drag a photo into the window. The interface accepts JPG, PNG, and WEBP formats.
Need to process multiple images? Flip the “Batch Upscayl” slider and choose a folder instead. The tool will then process every compatible image inside.
Next, pick your AI model from the dropdown. For your first attempt, stick with Upscayl Standard. You can always run the same image through different models later for comparison.
The scaling factor defaults to 4x. That means width and height both quadruple, resulting in 16 times the total pixels. A 2000×1200 photo becomes 8000×4800.
Slide the scale factor between 2x and 16x as needed. Higher factors work for large prints. But be realistic—scaling a tiny thumbnail to poster size won’t create details that never existed.
The “Double Upscayl” option runs two consecutive 4x passes for a total 16x enlargement. Skip this unless you have specific needs. Single-pass scaling at your target size usually works better.
Fine-Tuning in Settings
Click “Settings” in the top-left corner for more control.
Choose your output format: PNG, WEBP, or JPG. PNG preserves maximum quality but creates larger files. JPG compresses more but introduces some quality loss.
The “Fixed Width” option lets you specify exact pixel dimensions. Upscayl adjusts the height automatically to maintain aspect ratio.
Image compression defaults to 0, which is good. Higher compression reduces file size but degrades quality. Only increase this for massive images where storage matters more than perfection.
Test Time Augmentation (TTA) mode is the power-user feature. When enabled, Upscayl rotates your image eight different ways, processes each rotation, then combines the results. This eliminates artifacts and improves quality.
The downside? Processing takes eight times longer. A 30-second upscale becomes a 4-minute wait. Reserve TTA for your most important images.
Processing and Patience
Hit the “Upscayl” button to start. A progress bar appears, though it doesn’t always accurately reflect remaining time.
How long will it take? That depends entirely on your graphics card. A modern RTX 4070 might finish a 4x upscale in 15-30 seconds. An older GTX 1060 could take several minutes. Really old cards might struggle for 10+ minutes per image.
The program saves results to the same folder as your original by default. Or specify a different output folder in settings before clicking Upscayl.
Batch processing obviously takes longer. Processing 50 photos at 4x scale could range from 10 minutes to over an hour depending on your hardware.
Comparing Results
Upscayl displays a slider comparing the original and upscaled versions once processing finishes. Drag the slider left and right to see differences.
At first glance, the change might look subtle. Click the three-dot menu and increase the zoom level. Now the improvements become obvious—edges look sharper, details appear clearer, and text becomes readable.
The lens view option lets you move a magnifying circle around the image for pixel-level inspection.
Statistics in that same three-dot menu show average processing time per image during batch operations.
Not satisfied? Try a different AI model. Each one produces different textures and handles details uniquely. The best model for portraits might not be ideal for landscapes.
When Upscayl Shines
Small old photos benefit most. That 800×600 vacation shot from 2004 can become usable on modern displays. Social media profile pictures uploaded at tiny sizes can be recovered.
Screenshots with text get dramatically more readable after upscaling. Instructions captured at low resolution become clear again.
Digital artwork and illustrations scale beautifully with the Digital Art model. Pixel art maintains its character while gaining clean edges.
Medical images, technical diagrams, and scanned documents all improve. Though for documents, dedicated OCR tools might work better.
Realistic Expectations
Upscayl works wonders, but it’s not magic. The AI guesses at missing details based on training data. Sometimes those guesses are wrong.
Extremely blurry images won’t become perfectly sharp. Motion blur can’t be removed. Compression artifacts might actually become more visible at higher resolutions.
And remember—it’s not creating information that wasn’t there. It’s making educated guesses. A photo that’s out of focus will remain somewhat fuzzy, just at a higher resolution.
But for moderately soft images or pictures that are simply too small, Upscayl delivers impressive results. The difference between a conventional scale-up and AI enhancement is night and day.
Experiment with different models. Save the results and compare them at full zoom. The five minutes spent testing pays off when you find the perfect model for your specific image type.